How to Create a Professional Soccer Highlight Video
How to Create a Professional Soccer Highlight Video That Gets You Recruited
In the competitive world of college soccer recruitment, your highlight video often serves as your first impression with coaches. With hundreds of prospects vying for limited roster spots, a professionally crafted highlight reel can be the difference between getting noticed and being overlooked. This comprehensive guide provides actionable strategies for creating a highlight video that showcases your abilities effectively and captures the attention of college coaches.
Understanding What Coaches Want to See
College soccer coaches watch highlight videos with specific objectives in mind. They seek to evaluate technical skills, tactical intelligence, physical attributes, and mental qualities through brief video clips. Most importantly, coaches want to see these qualities demonstrated consistently across multiple games and competitive situations, not just isolated moments of brilliance.
The harsh reality of highlight video evaluation is that coaches typically watch only 30 to 60 seconds before deciding whether to continue[1]. This attention span reflects the volume of videos coaches receive—often hundreds per recruiting cycle—and the limited time available to review them. Understanding this constraint fundamentally shapes how effective highlight videos should be structured.
Coaches prioritize content over production quality. While professional editing and high-definition footage enhance the viewing experience, they cannot compensate for weak athletic performance or poor clip selection[1]. A simple, well-organized video featuring excellent game footage will always outperform an elaborately produced video showcasing mediocre play. This principle should guide every decision in the video creation process.
Gathering Quality Game Footage
The foundation of any highlight video is high-quality game footage that captures your performance in competitive environments. The best footage comes from games where you played well against strong opponents, demonstrating your abilities under pressure. Footage from showcase tournaments, league playoffs, and matches against top-ranked teams carries more weight than recreational games or one-sided victories.
Video quality matters, but perfection is not required. Coaches can evaluate talent from footage shot on smartphones or tablets, provided the camera angle captures the full field and the player is clearly visible. The ideal camera position is elevated and centered along the sideline, providing a tactical view that shows positioning, movement off the ball, and spatial awareness. Avoid close-up angles that only capture individual touches without context.
Recording multiple games is essential for building a comprehensive highlight library. A single exceptional performance provides limited material, while footage from five to ten games offers diverse clips that demonstrate consistency and versatility. Encourage parents, teammates, or club videographers to record your games regularly, ensuring you have ample material when it comes time to create your highlight video.
Selecting Your Best Clips
Clip selection is the most critical phase of highlight video creation. The goal is to identify 15 to 30 moments that best represent your abilities, showcase your strengths, and demonstrate your value to a college program[1][2]. This requires honest self-assessment and often benefits from input from coaches, teammates, or parents who can provide objective perspectives.
Your absolute best five plays must appear in the first 10 seconds of the video. This front-loading strategy acknowledges the limited attention span of coaches and ensures that even if they watch only a brief segment, they see your most impressive moments. These opening clips should be spectacular—game-winning goals, crucial saves, perfect assists, dominant tackles, or moments of exceptional skill that immediately capture attention.
After the opening sequence, organize clips by skill categories relevant to your position. Forwards should showcase goals, assists, movement off the ball, and finishing ability. Midfielders should highlight passing range, vision, defensive work rate, and transition play. Defenders should feature tackles, positioning, distribution, and aerial dominance. Goalkeepers should emphasize saves, command of the penalty area, distribution, and communication. This organizational structure helps coaches quickly assess your position-specific competencies.
Each clip should be extended slightly beyond the key moment to provide context. Showing the five seconds before and after a goal, for example, reveals your positioning, decision-making, and awareness rather than just the final shot. Coaches evaluate the process as much as the outcome, so providing this context enhances their ability to assess your soccer intelligence and tactical understanding.
Making Yourself Easy to Identify
One of the most common mistakes in highlight videos is failing to make the athlete clearly identifiable in every clip. Coaches cannot always read jersey numbers, especially in lower-quality footage or wide-angle shots. Without clear identification, coaches may lose track of which player they are supposed to be evaluating, undermining the entire purpose of the video.
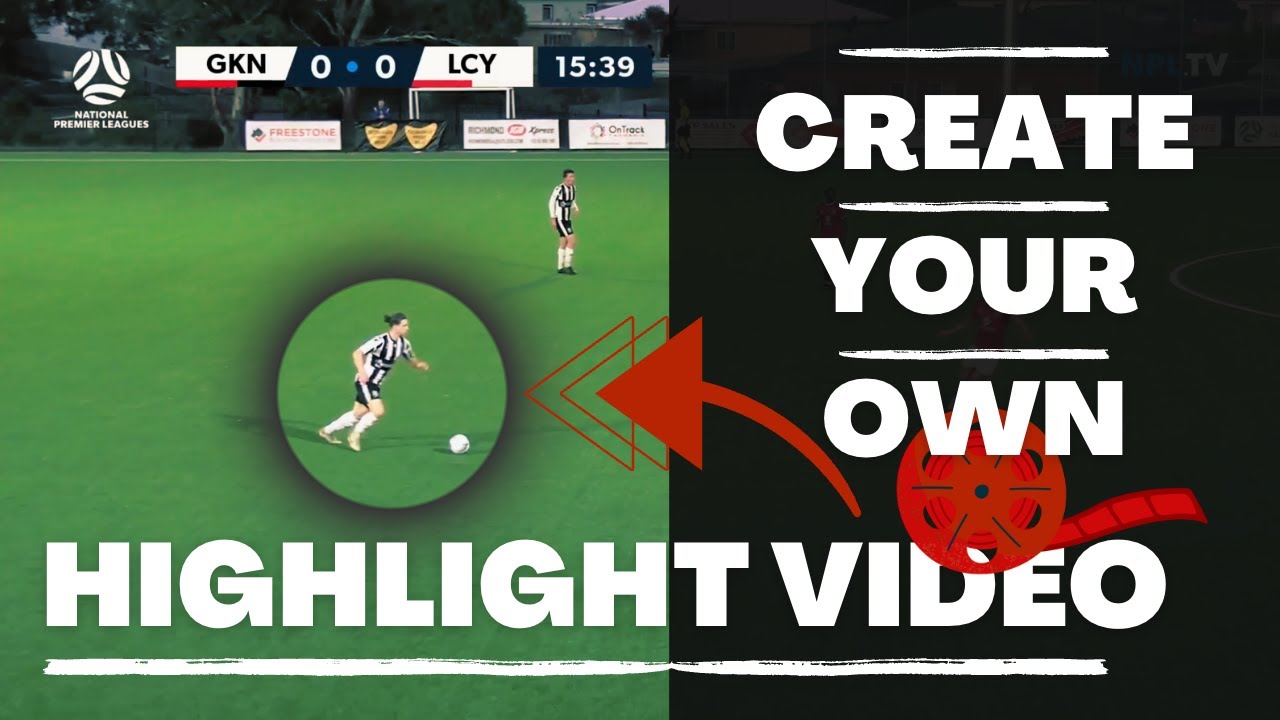
The solution is to add a visual marker—arrow, circle, spotlight, or other graphic element—that highlights you in every clip[1][2]. Most video editing software includes tools for adding these markers, and many recruiting platforms offer automated tracking features. The marker should be consistent throughout the video, using the same color and style to avoid confusion.
Some athletes use creative identification methods, such as wearing distinctive accessories like bright socks, headbands, or arm sleeves that make them stand out on the field. While these can help, they should supplement rather than replace digital markers in the final video. The combination of distinctive appearance and clear visual markers ensures coaches never lose sight of who they are evaluating.
Video Length and Structure
The optimal highlight video length is two to three minutes, featuring 15 to 30 of your best plays[1][2]. This duration provides sufficient material to demonstrate your abilities without testing coaches' patience. Videos longer than four minutes risk losing viewer attention, while videos shorter than two minutes may not provide enough evidence of consistent performance.
The video should begin with a player profile card displaying essential information. This introduction should include your name, graduation year, position, height, weight, hometown, contact information (email and phone), and key statistics. Some athletes also include their GPA, standardized test scores, and club coach contact information. This profile card should remain on screen for five to seven seconds, giving coaches time to note your information before the highlights begin.
After the opening profile and initial spectacular clips, the video should transition into organized skill sections. Each section should be clearly labeled—"Goals," "Assists," "Defensive Plays," etc.—using title cards or on-screen text. This organization helps coaches navigate the video and find specific skills they want to evaluate. The video should conclude with a final screen displaying your contact information and social media handles, making it easy for interested coaches to reach out.
Technical Production Tips
While content matters more than production quality, basic technical competence enhances the professionalism of your highlight video. Most athletes use consumer-level video editing software like iMovie, Windows Video Editor, or free online platforms like Clipchamp. These tools provide sufficient functionality for creating effective highlight videos without requiring advanced technical skills.
When editing clips, use clean cuts without excessive transitions or effects. Coaches prefer straightforward presentations that allow them to focus on your performance rather than flashy editing. Avoid slow-motion effects except for specific moments where they enhance understanding of technique or decision-making. Overuse of slow motion extends video length unnecessarily and can frustrate viewers.
Music selection is less important than many athletes assume. Most coaches watch highlight videos on mute, focusing entirely on the visual content[1]. If you choose to include music, select instrumental tracks that do not distract from the footage. Avoid songs with explicit lyrics or overly dramatic soundtracks that feel disconnected from the content. Some athletes skip music entirely, allowing the natural sounds of the game to play, which can feel more authentic.
Export your video in high-definition format (1080p minimum) to ensure clarity when coaches view it on various devices. Upload the video to platforms like YouTube, Vimeo, or Hudl, which provide reliable streaming and easy sharing. Set the video to "unlisted" rather than "private" so that anyone with the link can view it without requiring special permissions. Include the video link prominently in your recruiting profile, emails to coaches, and social media bios.
Distribution and Follow-Up
Creating an excellent highlight video is only the first step; effective distribution ensures coaches actually see it. Include your video link in every communication with college coaches, whether through email, recruiting platforms, or social media. When emailing coaches, keep your message concise and professional, introducing yourself briefly and explaining why you are interested in their program before providing the video link.
Post your highlight video on recruiting platforms like NCSA, SportsRecruits, or Trace iD, where coaches actively search for prospects. These platforms allow you to add context to your video, including statistics, academic information, and upcoming tournament schedules. Regularly update your profile to reflect new achievements, improved statistics, or additional footage.
Share your video on social media platforms, particularly Twitter and Instagram, which many college coaches use for recruiting. Tag the programs you are interested in and use relevant hashtags like #CollegeSoccerRecruiting, #ClassOf2029, or #NCAARecruiting. While social media should not be your primary recruiting strategy, it can supplement other efforts and increase your visibility.
After sending your video to coaches, follow up within one to two weeks if you have not received a response. Coaches are busy, and your initial email may have been overlooked or lost in their inbox. A polite follow-up message demonstrates genuine interest and persistence without being pushy. If a coach expresses interest after viewing your video, respond promptly and professionally, providing any additional information they request.
Common Mistakes to Avoid
Several recurring mistakes undermine the effectiveness of highlight videos. Avoid these pitfalls to ensure your video makes the best possible impression:
Starting with weak clips: Never save your best moments for later in the video. Coaches may never see them if they lose interest in the opening seconds.
Making the video too long: Videos exceeding four minutes rarely get watched in their entirety. Quality over quantity is the guiding principle.
Failing to identify yourself clearly: Without visual markers, coaches may lose track of which player they are evaluating, especially in team-oriented plays.
Showing only one skill: Demonstrating versatility is crucial. Forwards should show more than just goals; defenders should highlight more than just tackles.
Using poor-quality footage: While perfection is not required, footage must be clear enough for coaches to evaluate your technique and decision-making.
Over-editing: Excessive transitions, effects, and slow-motion segments distract from your performance and extend video length unnecessarily.
Updating Your Highlight Video
Your highlight video should evolve as you develop as a player. Create a new version at least once per year, incorporating recent footage that reflects your current skill level. As you compete in higher-level competitions, gain experience, and improve technically, your highlight video should showcase this growth.
Pay attention to feedback from coaches, club trainers, and recruiting advisors. If multiple coaches mention they want to see more of a specific skill, incorporate additional clips demonstrating that ability in your next video version. If coaches consistently stop watching at a certain point, analyze why and restructure accordingly.
Maintain multiple versions of your highlight video tailored to different audiences. A three-minute comprehensive version works well for initial outreach, while a 90-second condensed version can be effective for social media or quick follow-ups. Some athletes create position-specific versions that emphasize different skill sets depending on the program's playing style or tactical system.
Maximizing Your Recruiting Success
A professional highlight video is a powerful tool in your recruiting arsenal, but it should complement rather than replace other recruiting activities. Attend showcase tournaments, participate in college camps, maintain strong academic performance, and communicate consistently with coaches. The combination of excellent game footage, strategic distribution, and proactive recruiting efforts positions you for success in the competitive college soccer landscape.
Remember that your highlight video represents not just your athletic ability but also your professionalism, attention to detail, and commitment to your goals. Investing time and effort into creating a high-quality video demonstrates to coaches that you take the recruiting process seriously and are prepared for the demands of college athletics.
References
[1]: Things I Wish I Knew About Highlight Videos (Former D1 Player) - Reddit
[2]: 6 Tips for Creating Soccer Highlight Videos for College Recruiters - TraceUp